EVUNGO
Role: Senior UX/UI Designer – worked directly with co-founders in the team of User Researcher, UX Copy-Writer, 4 engineers, Product Owner and Product Manager.
The website is made by the external agency
The Problem
Expand the charging infrastructure in rural regions.


Project Timeline
I. Exploration.
2 weeks
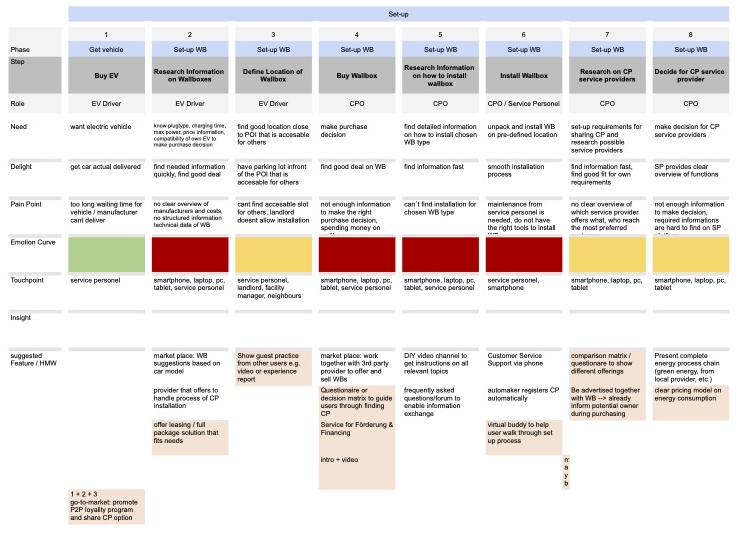
The team discovered market opportunities, user needs and built a user journey.
II. Validation.
5 weeks
The team conducted feasibility and viability analysis for the product concept, performed user testing, and iterated on the first concept, shaping a minimal viable product.
III. Incubation.
6 month
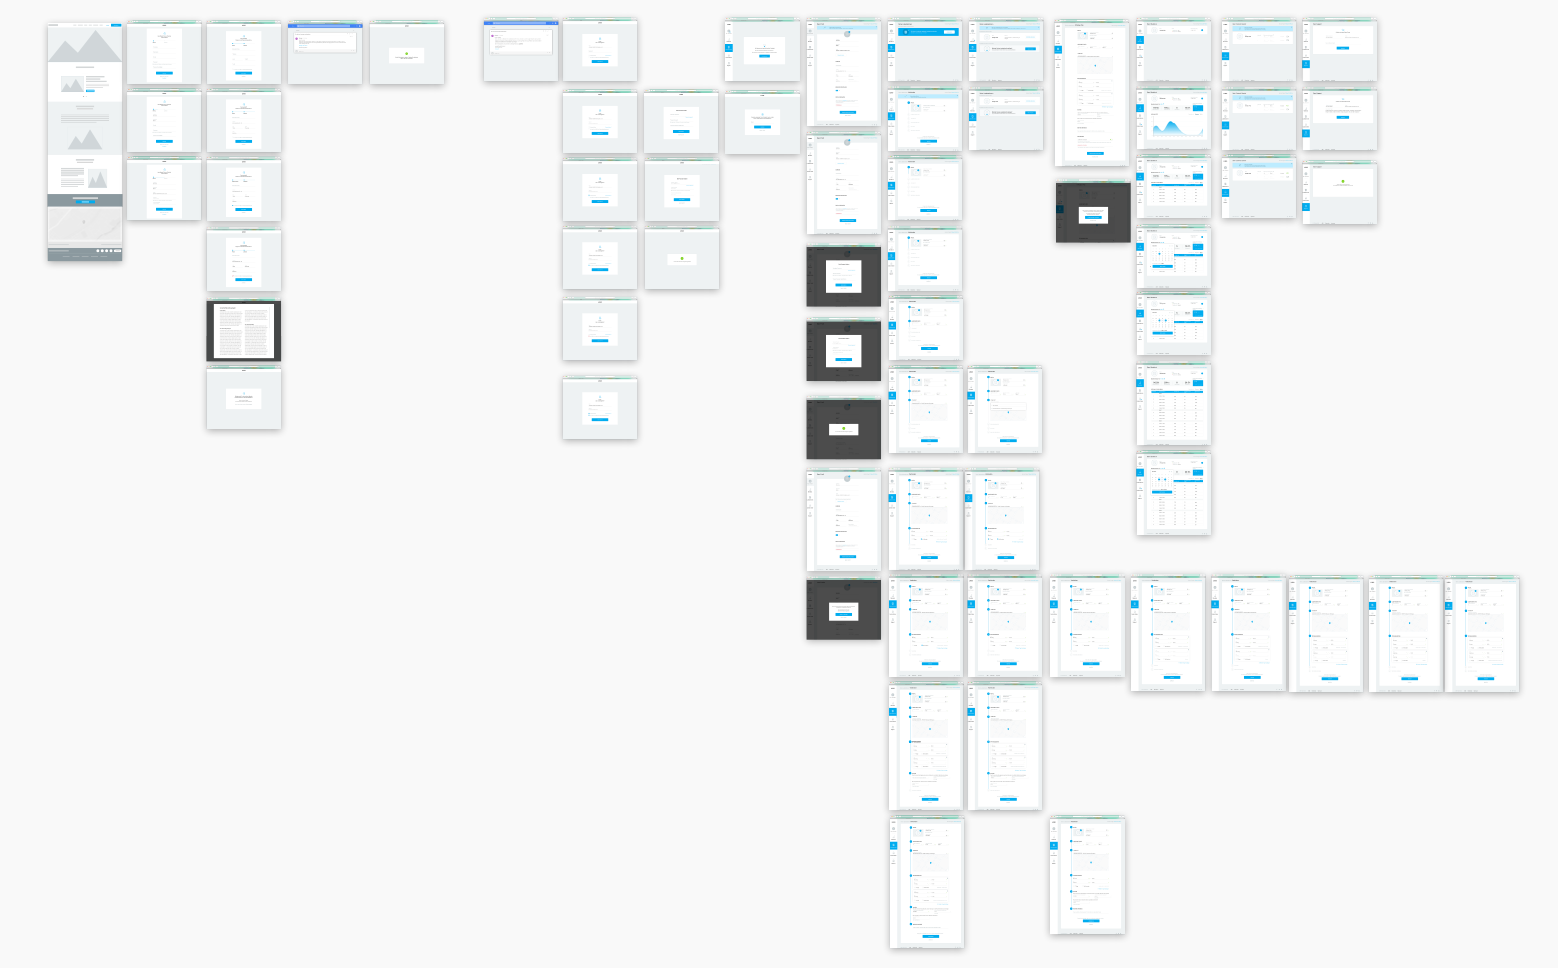
Lastly, we created a feature list and a sitemap, prepared wireframes, and prototypes, tested the second MVP version, iterated, developed, and launched the product.
Incubation — Wireframing
I joined the project at this stage. After completing the research and groundwork, I assumed responsibility for preparing wireframes and consolidating the sitemap into a comprehensive product.
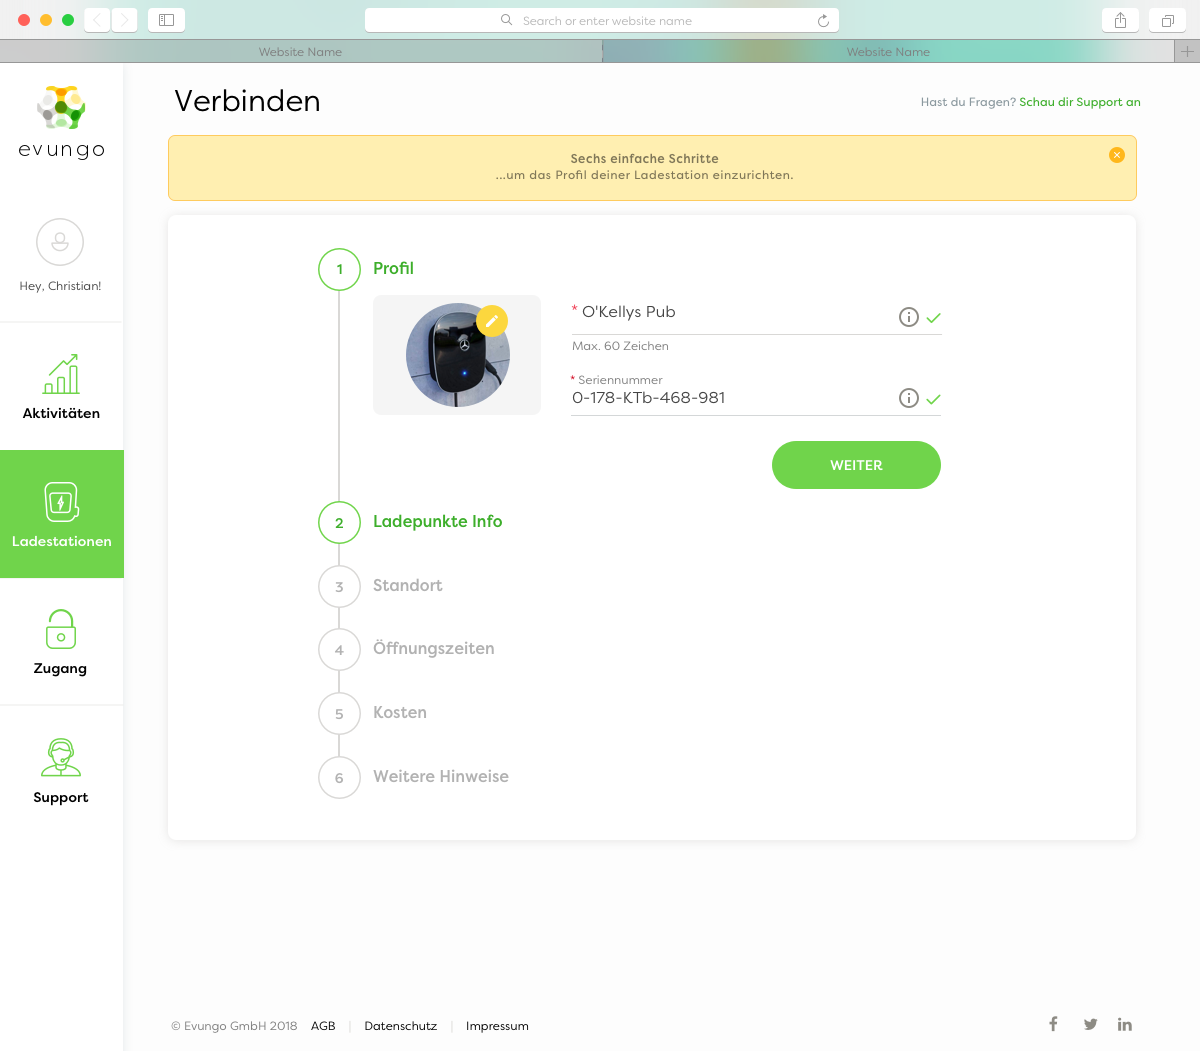
According to the benchmark study and research observations, the highest drop-off rate occurred during the registration of charging stations on the shared network platform. This was attributed to unclear technical details and the numerous steps required for completion. Collaborating with the engineers, we devised a solution wherein the Evungo platform automatically detects our charging station hardware protocol, and a significant portion of the technical data is pre-filled.
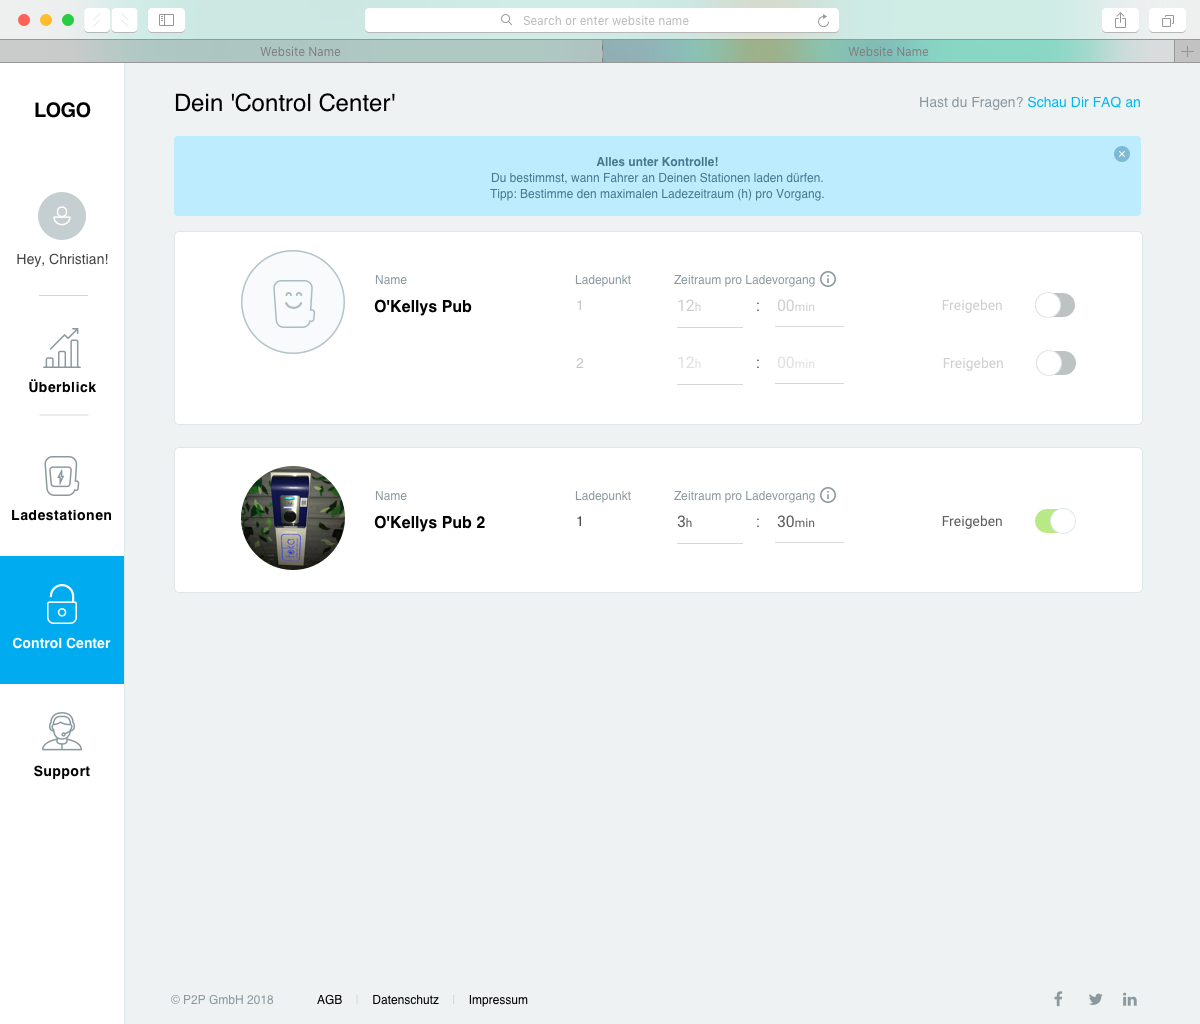
Another desired functionality involved controlling the usage of charging stations. The solution we proposed was implementing a time limit for EV drivers’ charging sessions, allowing for manual start charging control from the charging station owner’s side.
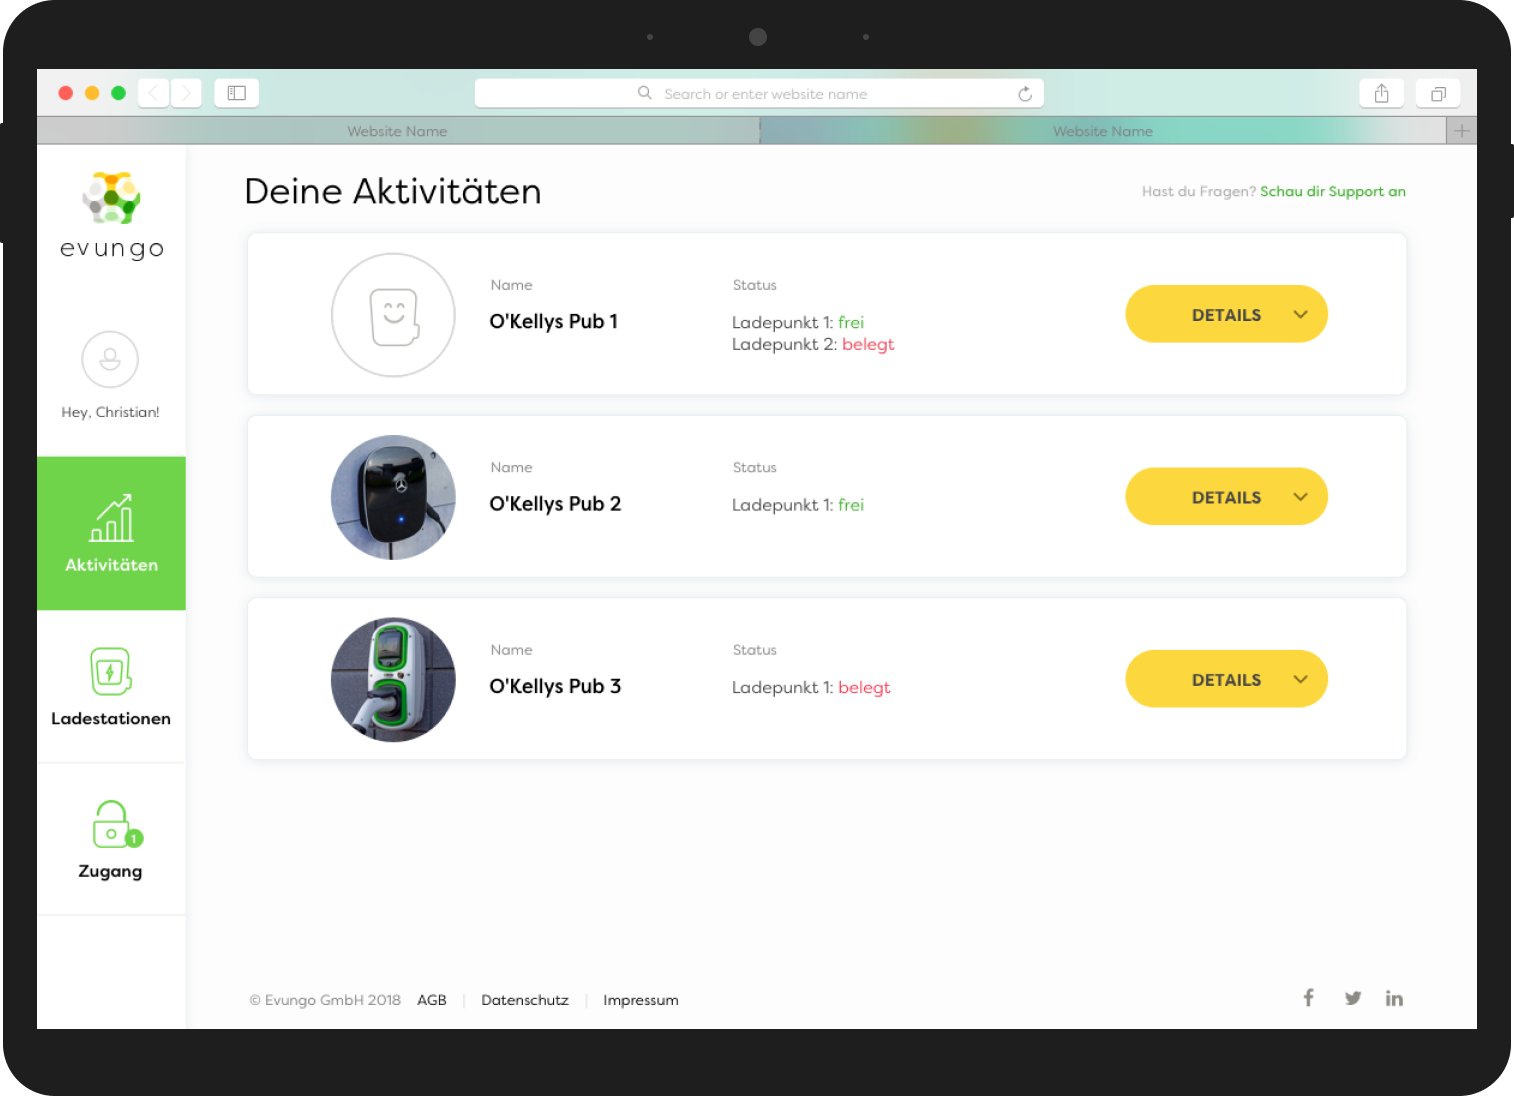
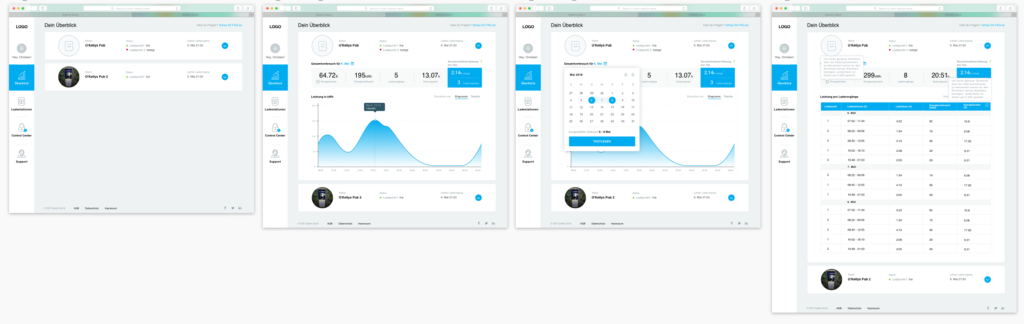
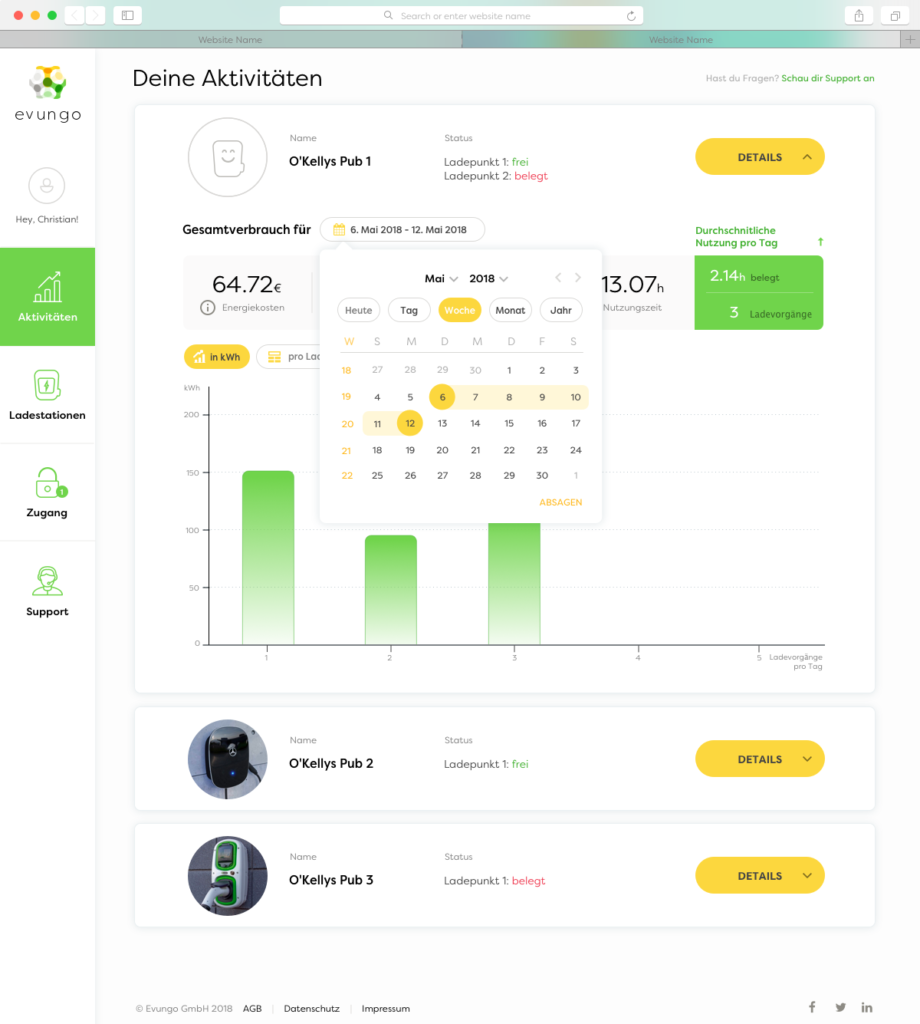
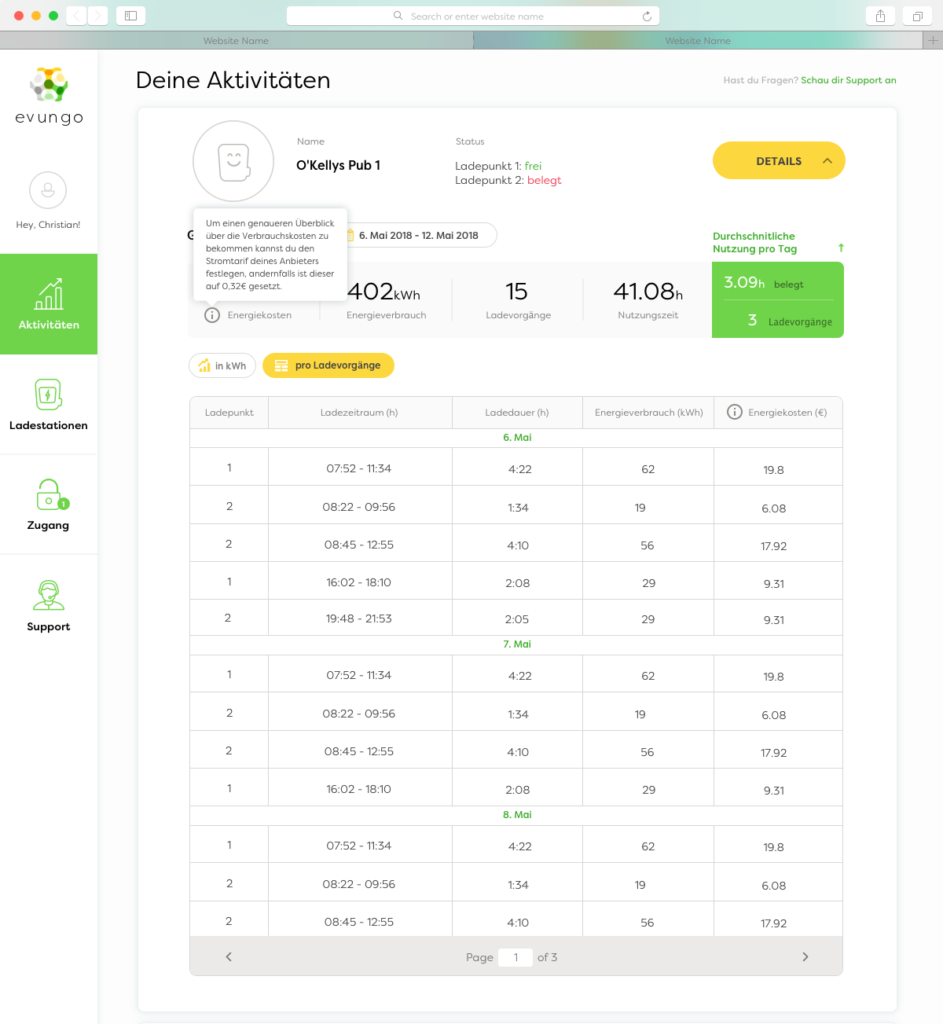
Charging station performance tracking was identified as one of the most desired features. Earlier investigations revealed that the number of charging sessions and the amount of energy consumed within a specific time frame were the most valuable data points for our customers.
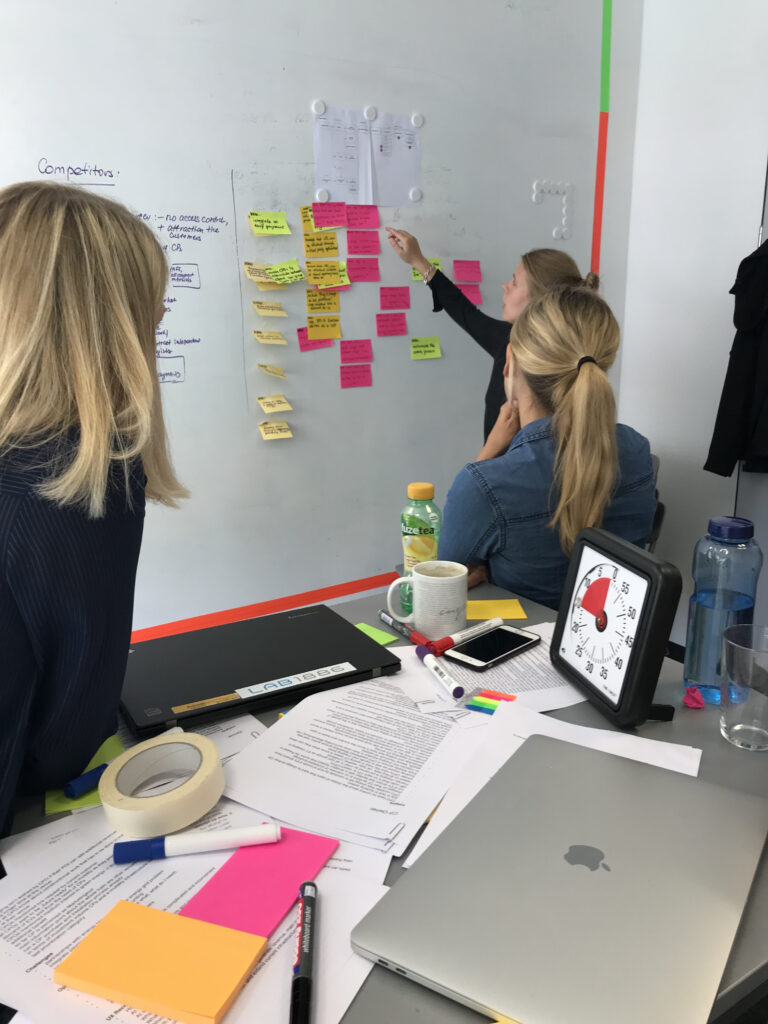
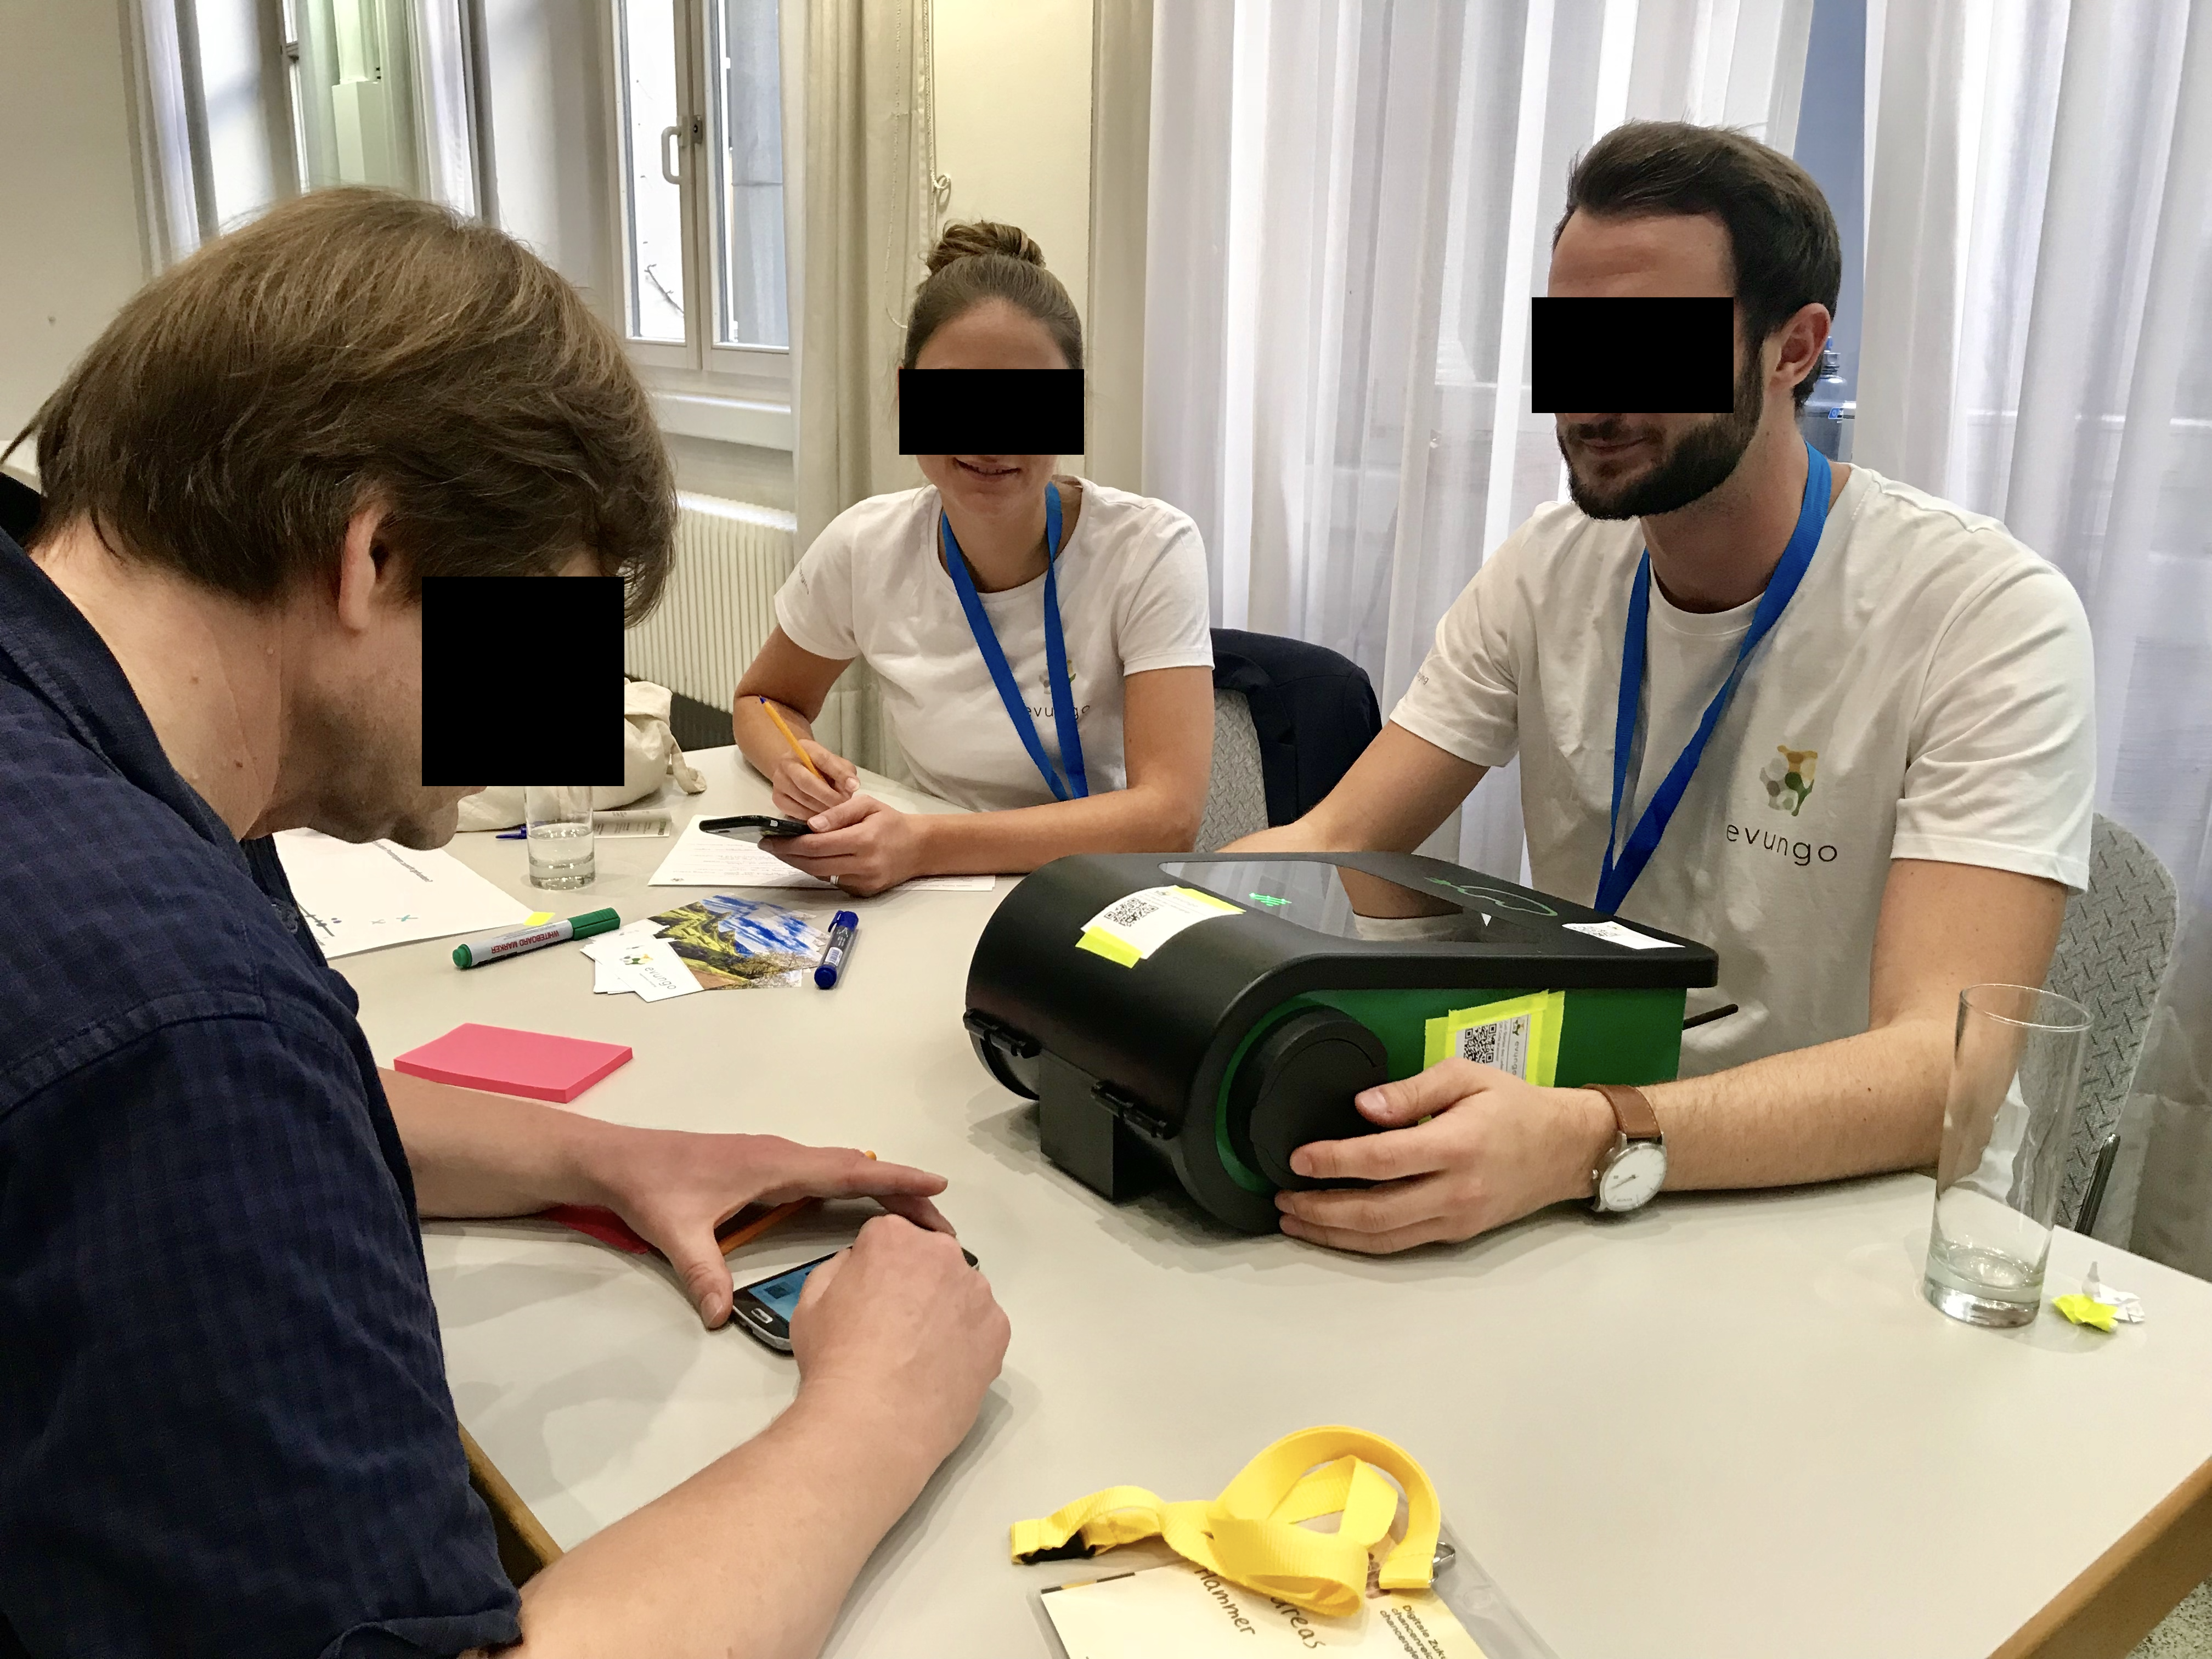
Incubation — Testing
When the flow was ready, we were looking to test the usability of 3 most critical tasks: 1) onboarding; 2) adding new charging station to the platform; 3) managing an existing charging station.
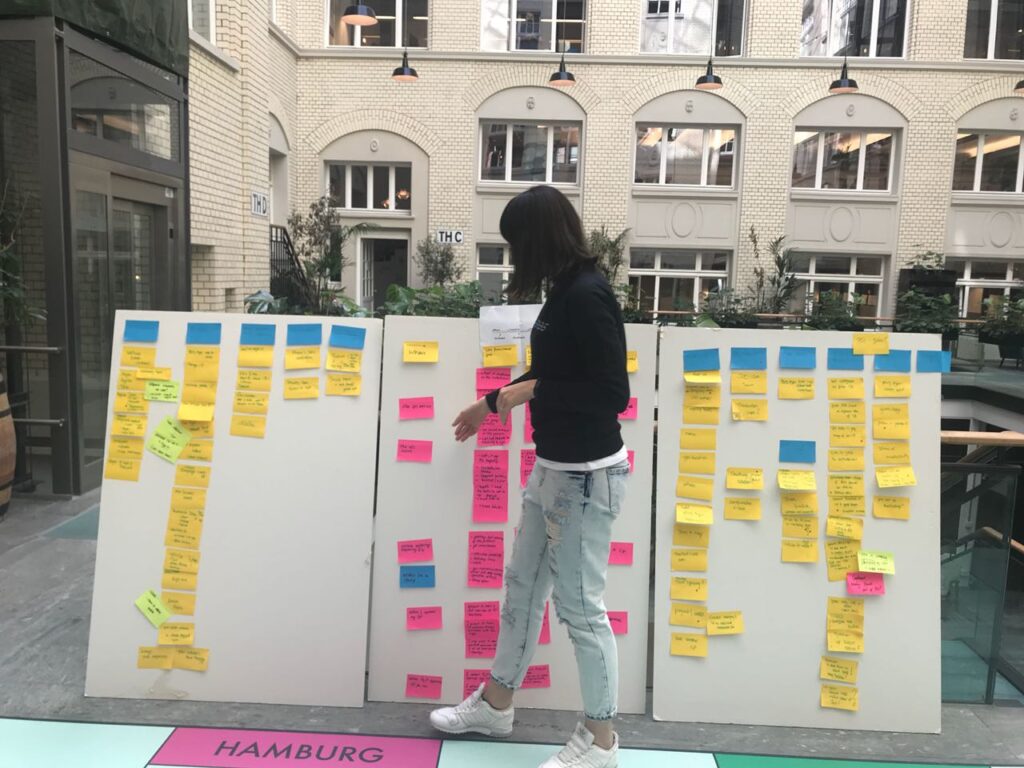
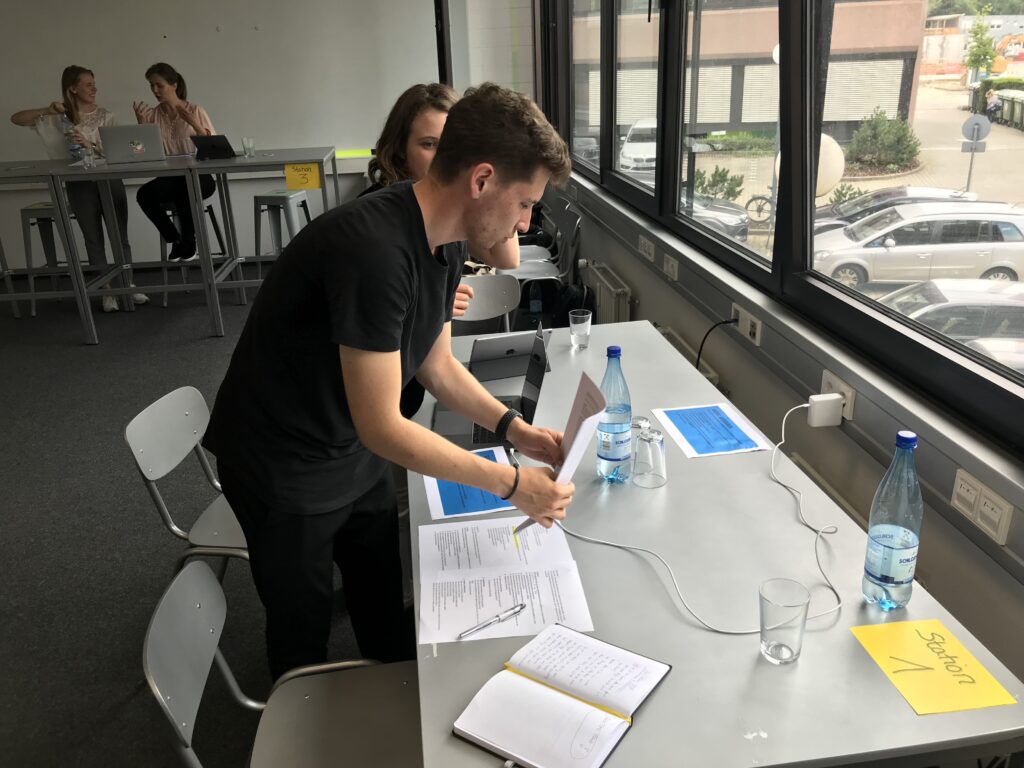
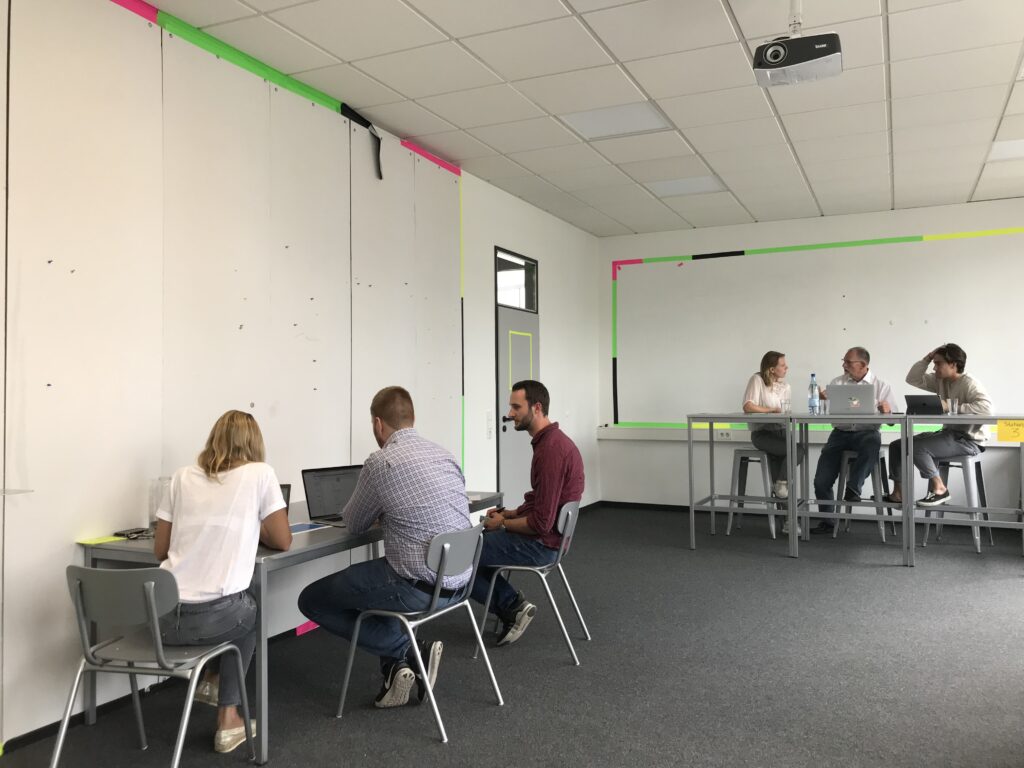
We invited 9 participants for the moderated on-site usability test and divided them into three groups. Each group was assigned specific tasks and interviewed simultaneously by individual interviewers. This setup allowed us to test the entire flow more efficiently, gathering a maximum number of responses.
The usability test synthesis revealed that:
- The duration of the charging session was confused with the operating hours of the charging station. 6 participants were not entirely satisfied with the provided solution.
- When adding a new charging station, 5 participants clicked on the label of the next step instead of the “Next” button at the bottom of the page.
- Finding a timeframe to check the charging station performance was challenging for four participants.
Incubation — Iteration and Final Design
After identifying usability issues, we iterated on the experience of adding a charging station by relocating the ‘Next’ button to the active step and making the next step labels clickable.
The calendar on the ‘Overview‘ page was repositioned closer to the graph/table tabs for increased visibility. Additionally, the graph view was modified to a weak view limit to enhance page loading speed and ensure a cleaner presentation of information.
The ‘Control Centre‘ section presented greater complexity concerning customer needs and technical feasibility. The team regrouped to brainstorm potential solutions based on the user needs uncovered during the usability test.
We aimed to devise a method to verify the driver for unlocking the station without any human involvement from both ends.
The core questions were:
- How might we find a frictionless way for one-time charging for a driver passing by the venue?
- How might we provide access to both restricted by time and 24/7, paid or free charging options simultaneously?
- How might we ensure that the hardware supports our protocol to process payments?
- How might we offer an end-to-end charging experience in rural areas with weak internet coverage?”
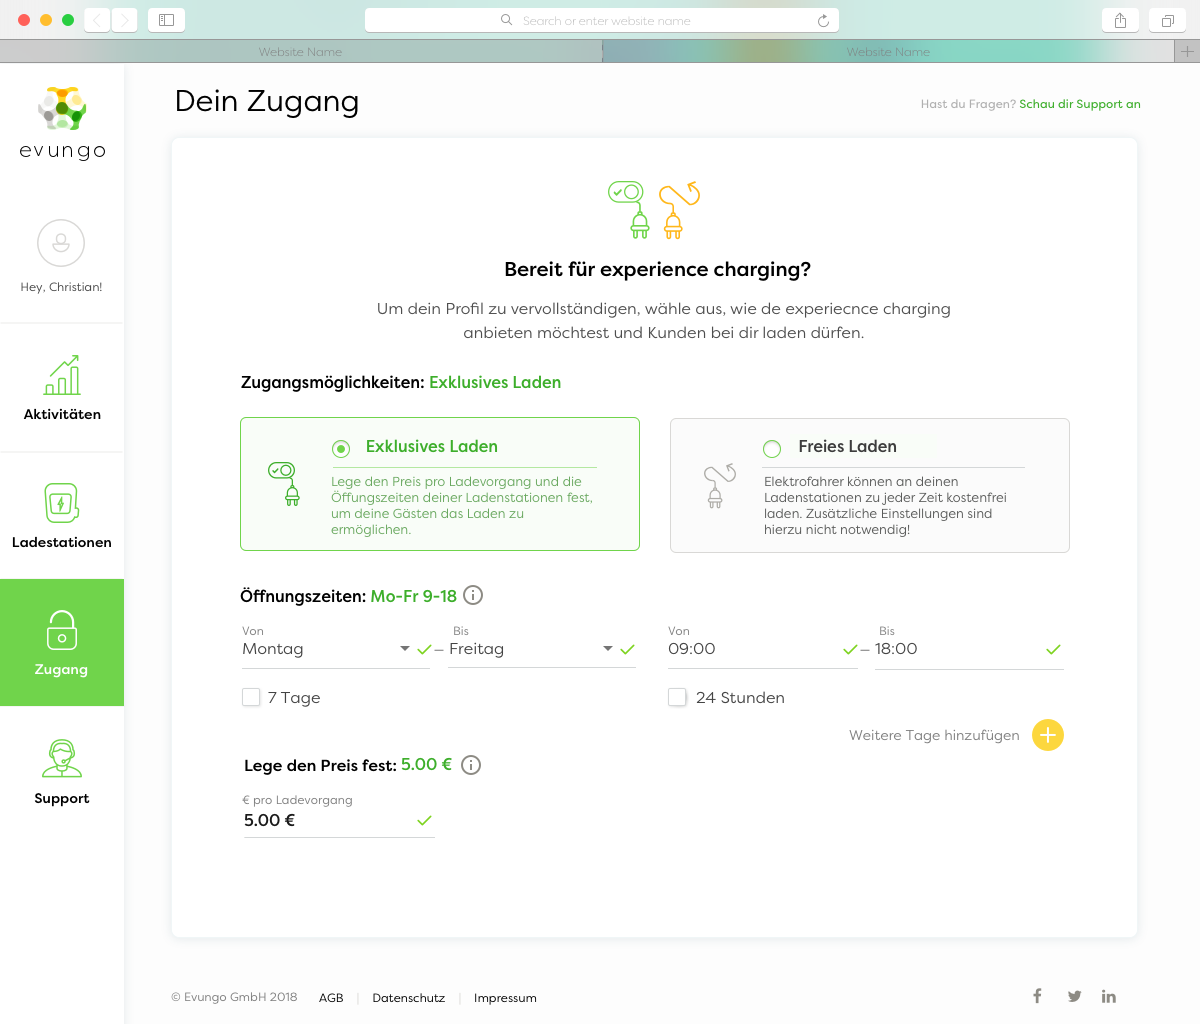
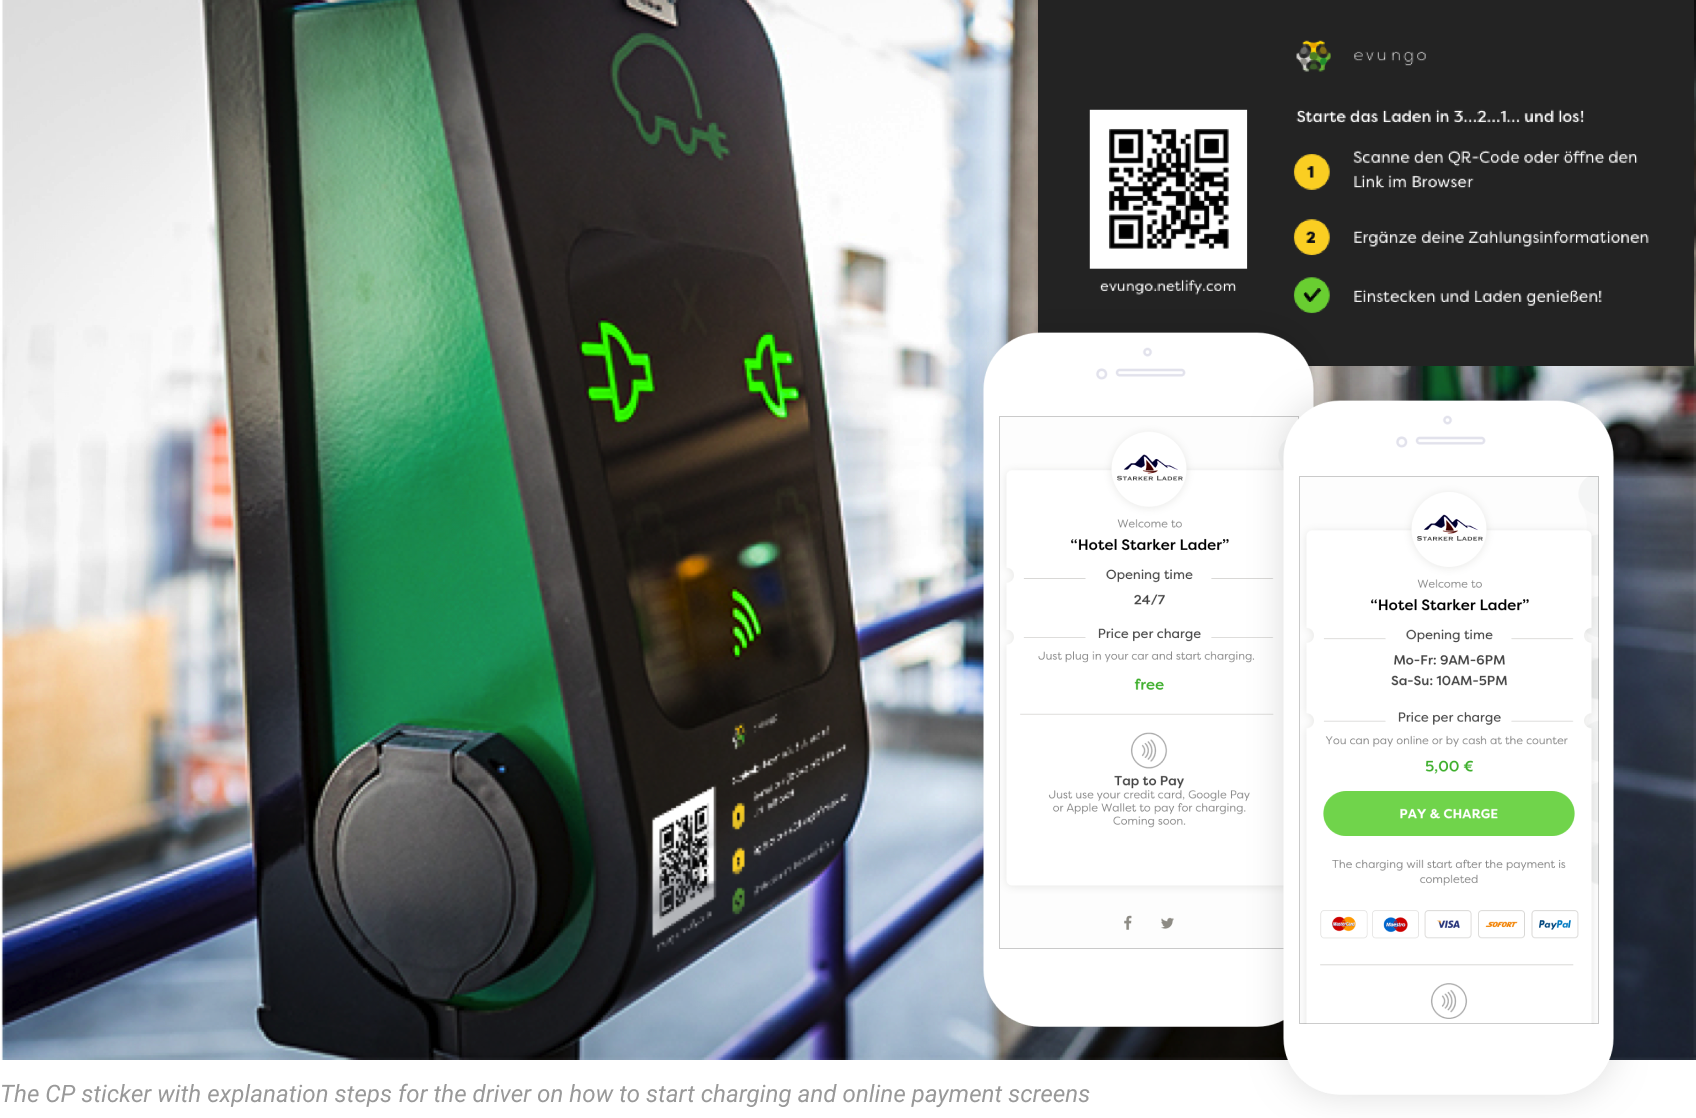
As a result of the brainstorming session, we introduced two simple options for the charging session: ‘Fixed’ with a set price per charge and specified opening times of the station, and ‘Flexible’ free of charge and available 24/7. Both options were designed to mitigate the physical involvement of the charging station owner and the driver.

To initiate charging, a driver needs to scan a QR code affixed to the hardware, which opens the Evungo web page displaying the price per charge and the ‘Start charging’ option. After completing the online payment, electricity is supplied to the car.
The final prototype and UI
after 9 months from idea exploration, we released an innovative way to expand EV’s network.